
4D v13.4
Adding pictures to the library
- 4D Design Reference
-
- Picture library
-
- Overview
- Adding pictures to the library
- Picture properties
- Modifying picture contents
- Creating thumbnails
- Drag and drop from the library
 Adding pictures to the library
You can add pictures to the Picture Library in three ways:
- By importing a picture file.
- By pasting a picture from the Clipboard (or using drag and drop).
- By creating a new picture (blank) in which you draw its contents.
4D can import and display the most current picture formats, such as the JPEG, SVG, PNG, BMP, GIF and TIFF formats (non-exhaustive list). If you import a picture whose format is not supported natively by 4D, the program will call on QuickTime® routines to interpret it (QuickTime must be installed on your machine).
To import a new picture into the Picture Library:
- Choose Open... in the options menu of the library:
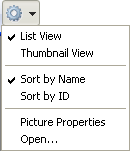
A standard Open file dialog box appears. The “Files of type” menu lets you display the file formats supported by 4D. - Select the file to be imported and click Open.
The Picture Properties dialog is displayed. The photo’s dimensions are automatically defined depending on the picture imported. For more information on picture properties, refer to Picture properties. - If necessary, modify the name and ID number as well as other properties and click OK to create the picture in the Picture Library.
Warning: You can only modify the ID number of the picture when it is being created in the Picture Library.
You can create a picture in the library by pasting a picture from the clipboard or dropping a picture file from another application (another 4D database, a system window, Web browser, and so on).
To add an external picture by copy-paste or drag and drop:
- Copy a picture to the Clipboard.
OR
Drag an external picture file and drop it onto the Picture Library list area. - (Copy-paste only) Select the Picture Library list area and press the Ctrl+V (Windows) or Command+V (Mac OS) keys or choose Paste from the Edit menu of 4D.
The Picture Properties dialog is displayed. The dimensions that appear in the dialog are the picture’s dimensions and its default name is From ClipBoard.
For more information on picture properties, refer to Picture properties. - If necessary, modify the ID number as well as other properties and click OK to create the picture in the Picture Library.
Warning: You can only modify the ID number of the picture when it is being created in the Picture Library.
The Picture Library contains an integrated graphics editor. You can create a blank picture and draw its contents using the editor.
To create a new picture:
- Click on the add button
 located below the list of pictures.
The Picture Properties dialog box is displayed. By default, the dimensions of the new pictures are 100x100 pixels. For more information on picture properties, refer to Picture properties. - If necessary, modify the name and ID number as well as other properties and click OK to create the picture in the Picture Library.
Warning: You can only modify the ID number of the picture when it is being created in the Picture Library.
Product: 4D
Theme: Picture library


