
4D v13
Data Manipulation with 4D Server
 Data Manipulation with 4D Server
In the section Defining the Database Structure, you have created the [Employees] table and let 4D create the default forms for that table. You are now ready to enter records.
In Design mode, 4D provides you by default with tools and editors for entering, querying, printing or modifying records. Subsequently, you can set up your own tools for the Application mode.
1. Choose New Record from the Records menu.
The blank input form appears.
2. Enter your first record as shown.
Use the Tab key or the mouse to navigate between the fields.
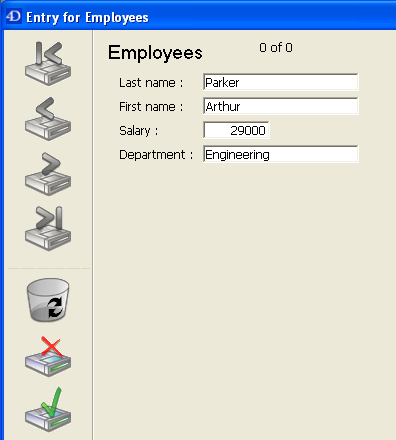
3. Click on the form validation button (the one at the bottom) to validate your data entry.
A blank input form appears so you can continue adding new records.
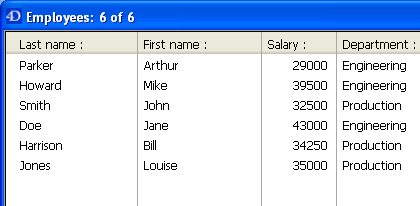
4. Enter five more records with the values listed here.
| Last Name | First Name | Salary | Department |
| Howard | Mike | 39500 | Engineering |
| Smith | John | 32500 | Production |
| Doe | Jane | 43000 | Engineering |
| Harrison | Bill | 34250 | Production |
| Jones | Louise | 35000 | Production |
After you have entered the last record, click the cancel icon (the one with a cross, above the validation icon) so that you cancel the new blank input form. You go back to the output form.
5. If all the six records are not shown, choose Show All from the Records menu and resize the window or columns if necessary.
You should have:
The records are now stored in the database on the server machine. If a second remote 4D were connected to the server machine, it could display the records you have just added. Conversely, if other clients were also entering records, you could choose Show All from the Records menu to display all the records, including the ones they had entered. Records stored on the server are accessible to all users.
Once you have entered records in the [Employees] table, you can search, sort, print, and otherwise manipulate the records. For example, let’s look for the employees of the Engineering department.
1. Click on the Querybutton in the toolbar.

The Query Editor appears:
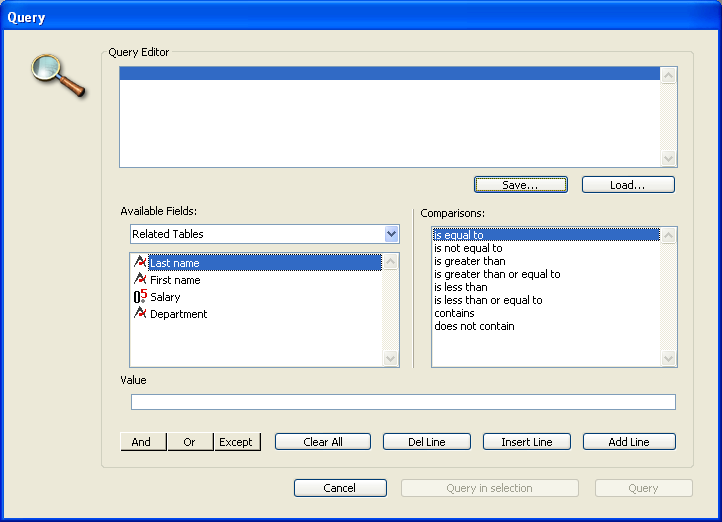
2. Click on Department in the Fields list, on “is equal to” in the Comparisons list, then enter Engineering in the Value area.
3. Click Query.
The query is sent to 4D Server, then 4D Server replies to 4D. In the output form, you now have only the employees who work in the Engineering department.
4. To show all the records again, choose Show All from the Records menu.
1. Choose Charts... from the Tools menu.
The Chart Wizard appears:
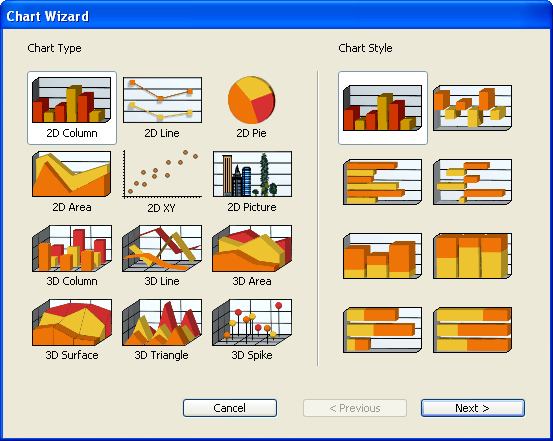
You are going to create a 2D Column chart (which is the chart type selected by default).
2. Click on the Next > button.
You must select the data that you want to use to create a new chart.
3. Drag and drop the field Last Name to the area Categories (X Axis) and the field Salary to the list Values (Z Axis):
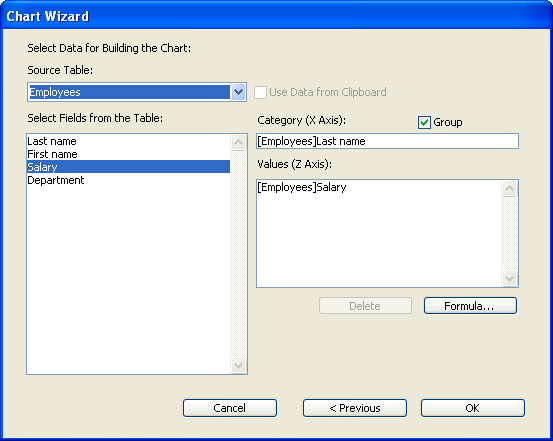
4. Click OK.
A Chart window appears, displaying the chart created according to your settings.
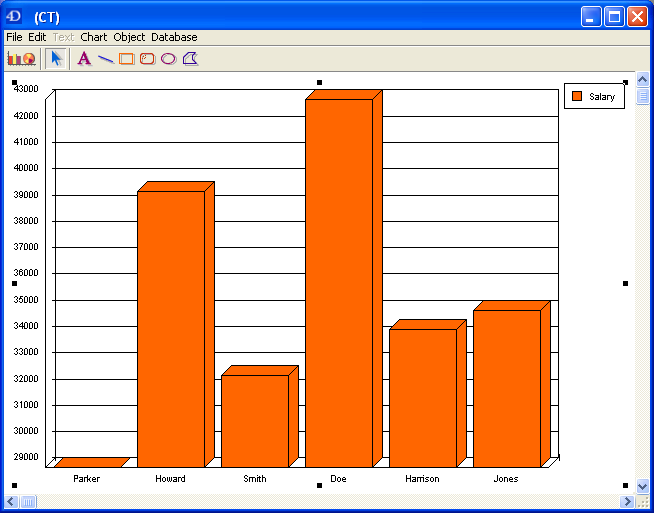
In just a few minutes, you have created a server database, defined a table, added records, then made a query and a chart using the data entered in the database.
It is now time to add a custom menu bar to your database. Go to the Adding a Custom Menu Bar section.
Product: 4D
Theme: 4D Server in 10 minutes


