4D v13.4
Executing a quick report
 Executing a quick report
After you have completed your report design, you can “print” the quick report. You can print a quick report to a variety of output types:
- On the standard printer selected,
- To disk, in a Text file,
- To a graph,
- To a 4D View document,
- To an HTML document.
To select an output destination, choose Destination from the File menu.
This option uses the printer you have chosen in your current print settings. If you are printing to a printer, you can preview the report before printing it.
To print to a printer:
- In the File menu, choose Printer from the Destination submenu.
This option is selected by default. - If necessary, select Page Setup from the File menu and specify your print parameters.
Note: This command is only available when the Printer destination is selected. - If you want to preview your report, select Print Preview... in the File menu.
Note: This command is only available when the Printer destination is selected.
The print preview dialog box appears, containing the report that you have defined with the current data of the database. - Select Generate... in the File menu.
- Choose the settings that are appropriate for your report and click the OK button.
This option sends your quick report to a disk file that you can open and modify with other applications, including text editors and spreadsheets. This option exports the records in the quick report to a text file.
When you use this option, 4D automatically uses the column headings as the first “record” that is exported.
To generate the report in a Text file:
- In the File menu, choose Disk File from the Destination submenu.
- Choose Generate... from the File menu.
4D displays a standard create-file dialog box and asks you to enter a filename. - Enter a filename and click OK.
4D displays a dialog box that keeps you informed of the progress of the operation. After the report is printed to a file, 4D returns you to the Quick Report editor. Remember to change the output device if you want to resume sending a quick report to a standard printer.
This option directs the report to 4D Chart, 4D’s plug-in for plotting data. When you choose the Graph item in the Destination submenu, your report is presented as a graph rather than in table form. Your graph can then be printed using 4D Chart.
- In list mode, 4D Chart uses only the summary calculations and labels in the Subtotal row. It uses the leftmost non-numeric column for the Categories axis (the horizontal axis). To use the Graph feature, your report should:
- Include from one to five numeric fields or formulas. These columns will be assigned to the values axis in the graph.
- Use one type of summary calculation per numeric field.

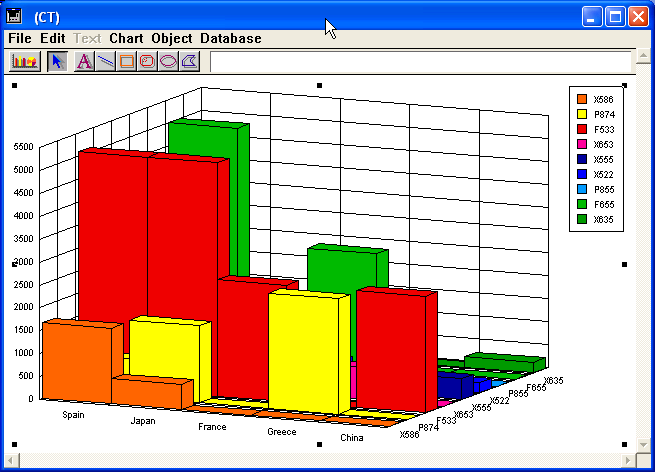
- In cross-table mode, 4D Chart uses two data sources and the value cell. The last row and column are ignored. For example, if you want to show the amount of sales per country for a set of products, you can define the following report:

To print to a graph:
- In the File menu, choose Graph from the Destination submenu.
- Choose Generate... from the File menu.
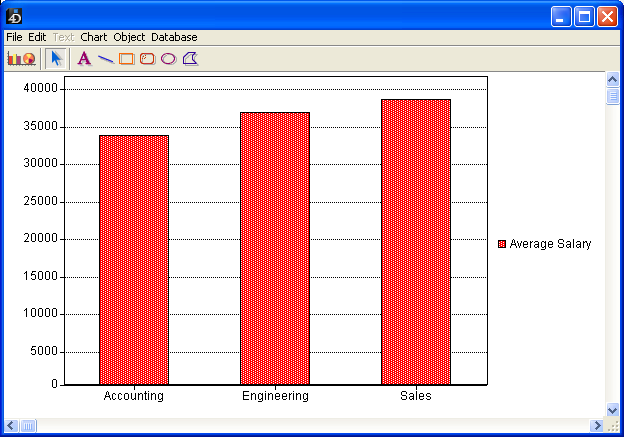
For list reports, 4D graphs your data as a 2D column graph:
For cross-table reports, 4D graphs the data as a 3D column graph:
You can use 4D Chart to select another graph type or print the graph. For more information about 4D Chart, refer to the Using 4D Chart chapter.
This option directs the report to 4D View, 4D’s plug-in for displaying data. When you choose the 4D View item in the Destination submenu, your report is presented as a 4D View window rather than in table form. 4D View uses all the data in the report.
Note: The 4D View destination is only available if this plug-in is installed in your 4D environment, and if you have the appropriate licenses.
To generate a report in a 4D View document:
- In the File menu, choose 4D View from the Destination submenu.
- Choose Generate... from the File menu.
4D creates a 4D View window containing the data. You can modify its contents, print it or save it using the 4D View menu commands. .
This option sends your quick report to an HTML file. When you choose this option, it uses the default HTML template unless it was changed programmatically.
When you use this option, 4D automatically uses the column headings as the first “record” that is exported.
To print to an HTML file:
- In the File menu, choose HTML File from the Destination submenu.
- Choose Generate... from the File menu.
4D displays a standard create-file dialog box and asks you to enter a filename. - Enter a filename and click OK.
4D displays a dialog box that keeps you informed of the progress of the operation. After the report is printed to an HTML file, 4D returns you to the Quick Report editor. Remember to change the output device if you want to resume sending a quick report to a standard printer.
The character set used for generating HTML code is specified using the “Standard Set” parameter of the Database settings (see the Web/Options (II) page).
Product: 4D
Theme: Quick reports


