
4D v13.4
Table properties
- 4D Design Reference
-
- Creating a database structure
-
- Database basics
- Structure editor
- Inspector palette
- Creating and modifying tables
- Table properties
- Creating and modifying fields
- 4D field types
- Field properties
- External data storage
- Rules for naming tables and fields
- Creating and modifying indexes
- Creating and modifying relations
- Types of relations
- Relation properties
- Exporting and importing structure definitions
 Table properties
You can set several properties for tables using the Inspector palette or, for certain ones, using the context menu for the tables.
A trigger is a method that runs automatically when certain events related to the table occur. The events are:
- On saving new record,
- On saving an existing record,
- On deleting a record.
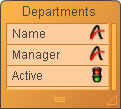
Trigger events can be set in the Inspector palette or using the context menu associated with the table (right-click on the title area of the table):

Check each event for which you want to activate the trigger.
You can access the trigger of a table directly from the Structure editor by clicking on the Edit... button in the Inspector palette or by selecting Edit Method... in the context submenu. For more information about triggers, refer to Types of Methods.
Notes:
- You can also create and display triggers with the Current form table of the Explorer.
- The information bar of the Structure editor indicates the triggers that are activated for each table.
The trigger that you enter in the Method editor will only be executed when the selected event(s) are detected.
You can set different attributes to configure the appearance and general behavior of each table.
This option lets you make a table invisible in the Application mode and for plug-ins. You can activate this option for utility tables or tables that are not being used temporarily.
Making a table invisible allows you to limit the operations that a user can perform on a table by making the table and its fields invisible in all editors and some dialog boxes that appear in the Application environment. It can also not be used by plug-ins.
The editors and dialog boxes concerned in the Application environment include the following:
- All query editors (see Searching records),
- Order by editor,
- Using 4D Chart editor,
- Label editor,
- Quick report editor,
- Exporting and importing data dialog boxes,
- Formula editor.
In each of these editors, the user is unable to see or choose the table or any of its fields. For instance, the user cannot include any fields from an invisible table in a report or label.
Note: When using these editors, users have the option of saving their specifications (e.g., the query or sort they created) to disk files. In this case, any specified tables or fields that are subsequently made invisible will may still be used in the operation. In addition, users can type the names of invisible tables and fields in the Formula editor dialog box.
Invisible tables and fields are displayed in italics in the Structure editor window.
A color can be attributed to each table. Using colors helps to organize the structure of a large database. For example, you could use one color for all tables that relate to customers and customer records and another color for tables that relate to inventory and inventory records.
Note: It is also possible to attribute a color to each field individually (see ) as well as to each relation (see Definition).
To set the color of one or more tables, make your selection and then choose the color using:
- The Color button
 of the Structure editor tool bar,
 - The Color command in the context menu of the tables,
- The Color option in the Inspector palette.
The Automatic option can be used to apply the standard original color to the table.
This option lets you optimize the deletion of a selection of records made using the DELETE SELECTION command.
When 4D deletes a selection, the record markers are also deleted. A record marker is a header attached to the record that contains information relating to this record. Deleting both markers and records is slower than deleting only records. In certain cases, it may be desirable to not automatically delete the record markers.
This option lets you set the type of deletion desired. To accelerate the deletion of a large selection made using the DELETE SELECTION command, deselect the Records definitively deleted option. Record markers will then not be deleted. This option cannot be set by programming.
When this option is checked, 4D generates the information necessary for replicating the records of the table (based more particularly on the primary key of the table). The record replication function allows data to be synchronized between two or more 4D databases for better security.
Once the option is activated, the replication mechanisms must be implemented using specific SQL language commands in 4D or using the HTTP protocol. For more information about this option and about the SQL replication mechanism itself, refer to Replication via SQL. For more information about replication using HTTP, refer to URL 4DSYNC/.
By default, this option is not checked. For this option to be available, you must specify a primary key for the table to be replicated. Otherwise, the option is dimmed. 4D lets you set a primary key for a table directly in the Structure editor (see below).
The Comments area of the Inspector palette lets you store additional information about the table. These comments are available for all the developers.
Note that each field and each relation has its own comments area.
The SQL area of the Inspector palette includes the “Schemas” menu and an information area.
- The “Schemas” menu lists all the SQL schemas specified in the database. You can use this menu to set the schema to which the table will belong (it is also possible to modify this property via SQL commands). Every database has at least one schema, named DEFAULT_SCHEMA. By default, all the tables belong to this schema. For more information about SQL schemas, refer to Schemas in the 4D SQL Reference guide.
- The information area indicates whether the name of the table respects the rules regarding SQL nomenclature (for example, unlike 4D, SQL does not allow a field name to contain spaces).
In 4D, you can manage the primary key of a table directly in the Structure editor.
In SQL, a primary key identifies the column(s) (field(s)) used for uniquely specifying the records (rows) in a table. Setting a primary key is necessary for the record replication function in a 4D table. In SQL, the primary key is set using the PRIMARY KEY clause followed by the list of columns (see Primary key in the 4D SQL Reference Guide).
You create and remove primary keys directly using the context menu of the Structure editor.
To create a primary key:
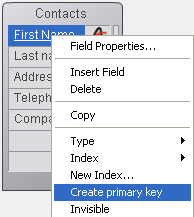
- Select the field(s) that make up the table’s primary key.
- Right click and choose Create primary key in the context menu:
The fields included in the primary key appear as underlined in the editor and their SQL description displays the PRIMARY KEY keyword.
The field(s) belonging to the primary key must not contain any duplicated values. If any duplicated values already exist in the table records, a warning dialog box appears to indicate that it is not possible to create the key because of this.
Note: The column(s) belonging to the primary key do not accept NULL values.
To remove a primary key from a table:
- Right click on the table containing the primary key and choose Remove primary key in the context menu:

A confirmation dialog box appears. Click OK to remove the primary key.
Product: 4D
Theme: Creating a database structure
primary key, replication***


